
We all love a good BBQ, especially on a national holiday when no one has to go into work Monday! These lovely 3-day weekends are also enjoyed because of the known fact for great food. Now I love food as much as the next person. You might even consider me a "foodie" of some sort...I love the way food tastes, smells, makes me feel, etc. But for some reason, all our senses go OUT THE WINDOW when we see an array of foods (we only dream about having in abundance, as if they were 0 calories) displayed on tabletops!! The unfortunate fact of going to any party or get-together is that not many know how to throw one that's healthy. Instead, most leave us feeling fat and uncomfortably full... :/

"It was a one-time thing. I'll never eat like that again!!" Yeah...that's what we all say. This Labor Day weekend, let's make some healthier choices, shall we??

Here are some healthy tips and recipes that can make this weekend seem more calming than stressful when it comes to what you're putting in your mouth...

TIP #1: DON'T GO TO A PARTY EMPTY HANDED!

We all like to sample everyone's cookin, but they may not have the same healthy intentions as you do. Bring a dish that you know is healthy and you can eat if nothing else looks appealing (sadly, sometimes this happens...). Great examples would be a fruit salad, veggies with low-fat dip, organic reduced guilt tortilla chips with fresh salsa, hummus with whole-wheat pita, etc. When you bring something along, not only will the host appreciate your thoughtfulness, so will your stomach. :)

TIP #2: THROW YOUR OWN BBQ!

What's better than drinking a few cocktails and not having to worry about a ride home?! (Nothing in my mind...) But besides that, having a party at your own place can save you THOUSANDS of calories because you're controlling the cooking!! Short on cash? Go to Costco and pick up some fresh fish, shrimp, chicken breasts, and lean ground turkey meat! You can grill the fish and make healthy tacos, skewer the shrimp for kabobs, grill up the chicken breasts for chicken burgers, and make pattys out of the turkey meat for turkey burgers (the guys can't tell the difference, I swear!). Costco is also great for picking up HUGE bags of veggies to throw on the grill as well!

TIP #3: MAKE YOUR OWN SIGNATURE COCKTAIL!

Its such a pain in the rear to buy 7 different kinds of top-shelf liquor, mixers, a variety of beers, white wines, red wines, etc!! It can literally break the bank and cause you to have a meltdown at the checkout counter (trust me, its happened). Instead, choose one signature drink to make, such as skinny margaritas or red-wine sangria, along with ONE type of beer on ice. Making a few pitchers of one thing is SO MUCH EASIER than making drinks, hiring a bartender, people messing up your kitchen, etc. Plus, it adds some pizzazz to your party! Don't worry that you're not going to satisfy everyone...if its free, people are drinking it.

TIP #4: STOP ACTING LIKE YOU'RE GOING TO JAIL TOMORROW!

The food will be there tomorrow. And the next day. And the day after that. You can always grill up another burger, make another batch of cookies, and chug another cocktail--tomorrow. You're not heading to the slammer. During holiday weekends--and especially at BBQs where the food options are endless--we forget what and WHY we're eating. This weekend, try to ENJOY what you put in your mouth--it's much more pleasurable. Don't just pick (and pick, and pick...) at the food on all the tables. Instead, grab a drink and a small plate with a few of your favorite foods, then WALK AWAY FROM THE FOOD!! We tend to eat an abundant amount more when we are hovering over it (see visual example below and don't let this be you...).

TIP #5: EAT AN APPLE BEFORE YOU HEAD OUT!

I know this sounds silly, but it really does work. Apples are full of fiber and healthy carbs that fill our bellies and make us feel less hungry. This way, when you get to wherever you're headed, you won't beeline for the food table! Instead, you can enjoy the company before feeling the need to nosh...

And now what I know you've all been waiting for and my favorite part of the blog...RECIPES IDEAS for any big party! These recipes are created for large parties (15-20 people), so double or cut recipes in half depending on how many you're cooking for!

Greek Pasta Salad with Grilled Chicken

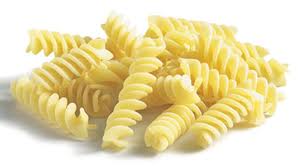
2 bags whole wheat fusilli or penne; 4 grilled chicken breasts, cooked and diced; 1 large cucumber, washed and diced; 1 large red onion, diced; 1 large red bell pepper, seeded and chopped; 1 can sun-dried tomatoes, sliced; 1 can artichoke hearts, in water; 1/4 cup reduced-fat feta cheese; 1 cup sliced black olives; dried basil and oregano; 1/4 cup olive oil; 1/4 cup rice vinegar; 1/4 cup red wine vinegar; fresh garlic, finely chopped; sea salt; fresh ground pepper; fresh parsley; 2 tbsp pine nuts

Cook pasta according to package and set aside to cool. In a small bowl, combine olive oil, vinegars, garlic, and dried herbs. Set aside. In a large bowl, combine the cooled pasta, diced chicken, cucumber, red onion, bell pepper, sun-dried tomatoes, artichoke hearts, feta cheese, and black olives. Add dressing into large bowl and combine all ingredients. Sprinkle with sea salt and pepper to taste. Cover and refrigerate at least an hour before serving. Mix in fresh parsley and pine nuts before serving. Serves 15-20 people.

Shrimp Kabobs

1-2 pounds of raw deveined shrimp; 4 tbsp olive oil; 2 fresh garlic cloves, chopped; lemon; one fresh pineapple, cut and diced into 1-inch cubes; sea salt; fresh ground pepper; skewers

Pre-heat the BBQ over med-high heat. Peel and clean shrimp, set aside. Combine olive oil, garlic, and the juice of 1 lemon into a small petri dish. Grab a large plate and begin to skewer the shrimp and pineapple on the kabob (one shrimp, one pineapple piece, one shrimp, etc.) until all the shrimp and pineapple have been used up. Season each side with a small amount of sea salt and fresh ground pepper. Take a basting brush and gently marinate each skewer with the olive oil mixture. Cook each skewer on the BBQ for 2-3 minutes on each side, or until shrimp turns opaque.

No Pudge Fudge Brownies

Look for the box at Trader Joe's. They are honestly amazing!! All you need to do is add non-fat yogurt. They are my favorite (and easiest) dessert to make for big parties, BBQs, hosted events. etc. Everyone loves these and has NO IDEA they are healthy!! I serve these on a platter or in a martini glass (if I'm feeling extra fancy!) with a side of non-fat vanilla frozen yogurt, some whipped cream, and fresh strawberries.

And there you have it! Now go and have a wonderful and HEALTHY Labor Day weekend! NO EXCUSES!! :)

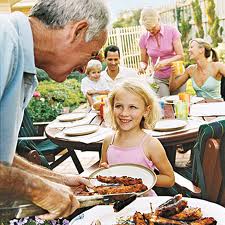 We all love a good BBQ, especially on a national holiday when no one has to go into work Monday! These lovely 3-day weekends are also enjoyed because of the known fact for great food. Now I love food as much as the next person. You might even consider me a "foodie" of some sort...I love the way food tastes, smells, makes me feel, etc. But for some reason, all our senses go OUT THE WINDOW when we see an array of foods (we only dream about having in abundance, as if they were 0 calories) displayed on tabletops!! The unfortunate fact of going to any party or get-together is that not many know how to throw one that's healthy. Instead, most leave us feeling fat and uncomfortably full... :/
 TIP #1: DON'T GO TO A PARTY EMPTY HANDED!
 We all like to sample everyone's cookin, but they may not have the same healthy intentions as you do. Bring a dish that you know is healthy and you can eat if nothing else looks appealing (sadly, sometimes this happens...). Great examples would be a fruit salad, veggies with low-fat dip, organic reduced guilt tortilla chips with fresh salsa, hummus with whole-wheat pita, etc. When you bring something along, not only will the host appreciate your thoughtfulness, so will your stomach. :)
 TIP #2: THROW YOUR OWN BBQ!
 What's better than drinking a few cocktails and not having to worry about a ride home?! (Nothing in my mind...) But besides that, having a party at your own place can save you THOUSANDS of calories because you're controlling the cooking!! Short on cash? Go to Costco and pick up some fresh fish, shrimp, chicken breasts, and lean ground turkey meat! You can grill the fish and make healthy tacos, skewer the shrimp for kabobs, grill up the chicken breasts for chicken burgers, and make pattys out of the turkey meat for turkey burgers (the guys can't tell the difference, I swear!). Costco is also great for picking up HUGE bags of veggies to throw on the grill as well!
 Its such a pain in the rear to buy 7 different kinds of top-shelf liquor, mixers, a variety of beers, white wines, red wines, etc!! It can literally break the bank and cause you to have a meltdown at the checkout counter (trust me, its happened). Instead, choose one signature drink to make, such as skinny margaritas or red-wine sangria, along with ONE type of beer on ice. Making a few pitchers of one thing is SO MUCH EASIER than making drinks, hiring a bartender, people messing up your kitchen, etc. Plus, it adds some pizzazz to your party! Don't worry that you're not going to satisfy everyone...if its free, people are drinking it.
 TIP #4: STOP ACTING LIKE YOU'RE GOING TO JAIL TOMORROW!
 The food will be there tomorrow. And the next day. And the day after that. You can always grill up another burger, make another batch of cookies, and chug another cocktail--tomorrow. You're not heading to the slammer. During holiday weekends--and especially at BBQs where the food options are endless--we forget what and WHY we're eating. This weekend, try to ENJOY what you put in your mouth--it's much more pleasurable. Don't just pick (and pick, and pick...) at the food on all the tables. Instead, grab a drink and a small plate with a few of your favorite foods, then WALK AWAY FROM THE FOOD!! We tend to eat an abundant amount more when we are hovering over it (see visual example below and don't let this be you...).
 TIP #5: EAT AN APPLE BEFORE YOU HEAD OUT!
 I know this sounds silly, but it really does work. Apples are full of fiber and healthy carbs that fill our bellies and make us feel less hungry. This way, when you get to wherever you're headed, you won't beeline for the food table! Instead, you can enjoy the company before feeling the need to nosh...
 And now what I know you've all been waiting for and my favorite part of the blog...RECIPES IDEAS for any big party! These recipes are created for large parties (15-20 people), so double or cut recipes in half depending on how many you're cooking for!
 Greek Pasta Salad with Grilled Chicken
 2 bags whole wheat fusilli or penne; 4 grilled chicken breasts, cooked and diced; 1 large cucumber, washed and diced; 1 large red onion, diced; 1 large red bell pepper, seeded and chopped; 1 can sun-dried tomatoes, sliced; 1 can artichoke hearts, in water; 1/4 cup reduced-fat feta cheese; 1 cup sliced black olives; dried basil and oregano; 1/4 cup olive oil; 1/4 cup rice vinegar; 1/4 cup red wine vinegar; fresh garlic, finely chopped; sea salt; fresh ground pepper; fresh parsley; 2 tbsp pine nuts
 Cook pasta according to package and set aside to cool. In a small bowl, combine olive oil, vinegars, garlic, and dried herbs. Set aside. In a large bowl, combine the cooled pasta, diced chicken, cucumber, red onion, bell pepper, sun-dried tomatoes, artichoke hearts, feta cheese, and black olives. Add dressing into large bowl and combine all ingredients. Sprinkle with sea salt and pepper to taste. Cover and refrigerate at least an hour before serving. Mix in fresh parsley and pine nuts before serving. Serves 15-20 people.
 Shrimp Kabobs
 1-2 pounds of raw deveined shrimp; 4 tbsp olive oil; 2 fresh garlic cloves, chopped; lemon; one fresh pineapple, cut and diced into 1-inch cubes; sea salt; fresh ground pepper; skewers
 Pre-heat the BBQ over med-high heat. Peel and clean shrimp, set aside. Combine olive oil, garlic, and the juice of 1 lemon into a small petri dish. Grab a large plate and begin to skewer the shrimp and pineapple on the kabob (one shrimp, one pineapple piece, one shrimp, etc.) until all the shrimp and pineapple have been used up. Season each side with a small amount of sea salt and fresh ground pepper. Take a basting brush and gently marinate each skewer with the olive oil mixture. Cook each skewer on the BBQ for 2-3 minutes on each side, or until shrimp turns opaque.
 No Pudge Fudge Brownies
 Look for the box at Trader Joe's. They are honestly amazing!! All you need to do is add non-fat yogurt. They are my favorite (and easiest) dessert to make for big parties, BBQs, hosted events. etc. Everyone loves these and has NO IDEA they are healthy!! I serve these on a platter or in a martini glass (if I'm feeling extra fancy!) with a side of non-fat vanilla frozen yogurt, some whipped cream, and fresh strawberries.
 And there you have it! Now go and have a wonderful and HEALTHY Labor Day weekend! NO EXCUSES!! :)







 Posts
Posts

